
My Desktop With i3, polybar, conky, and rofi
This weekend i’ve been playing with my i3 desktop settings. Here are the result

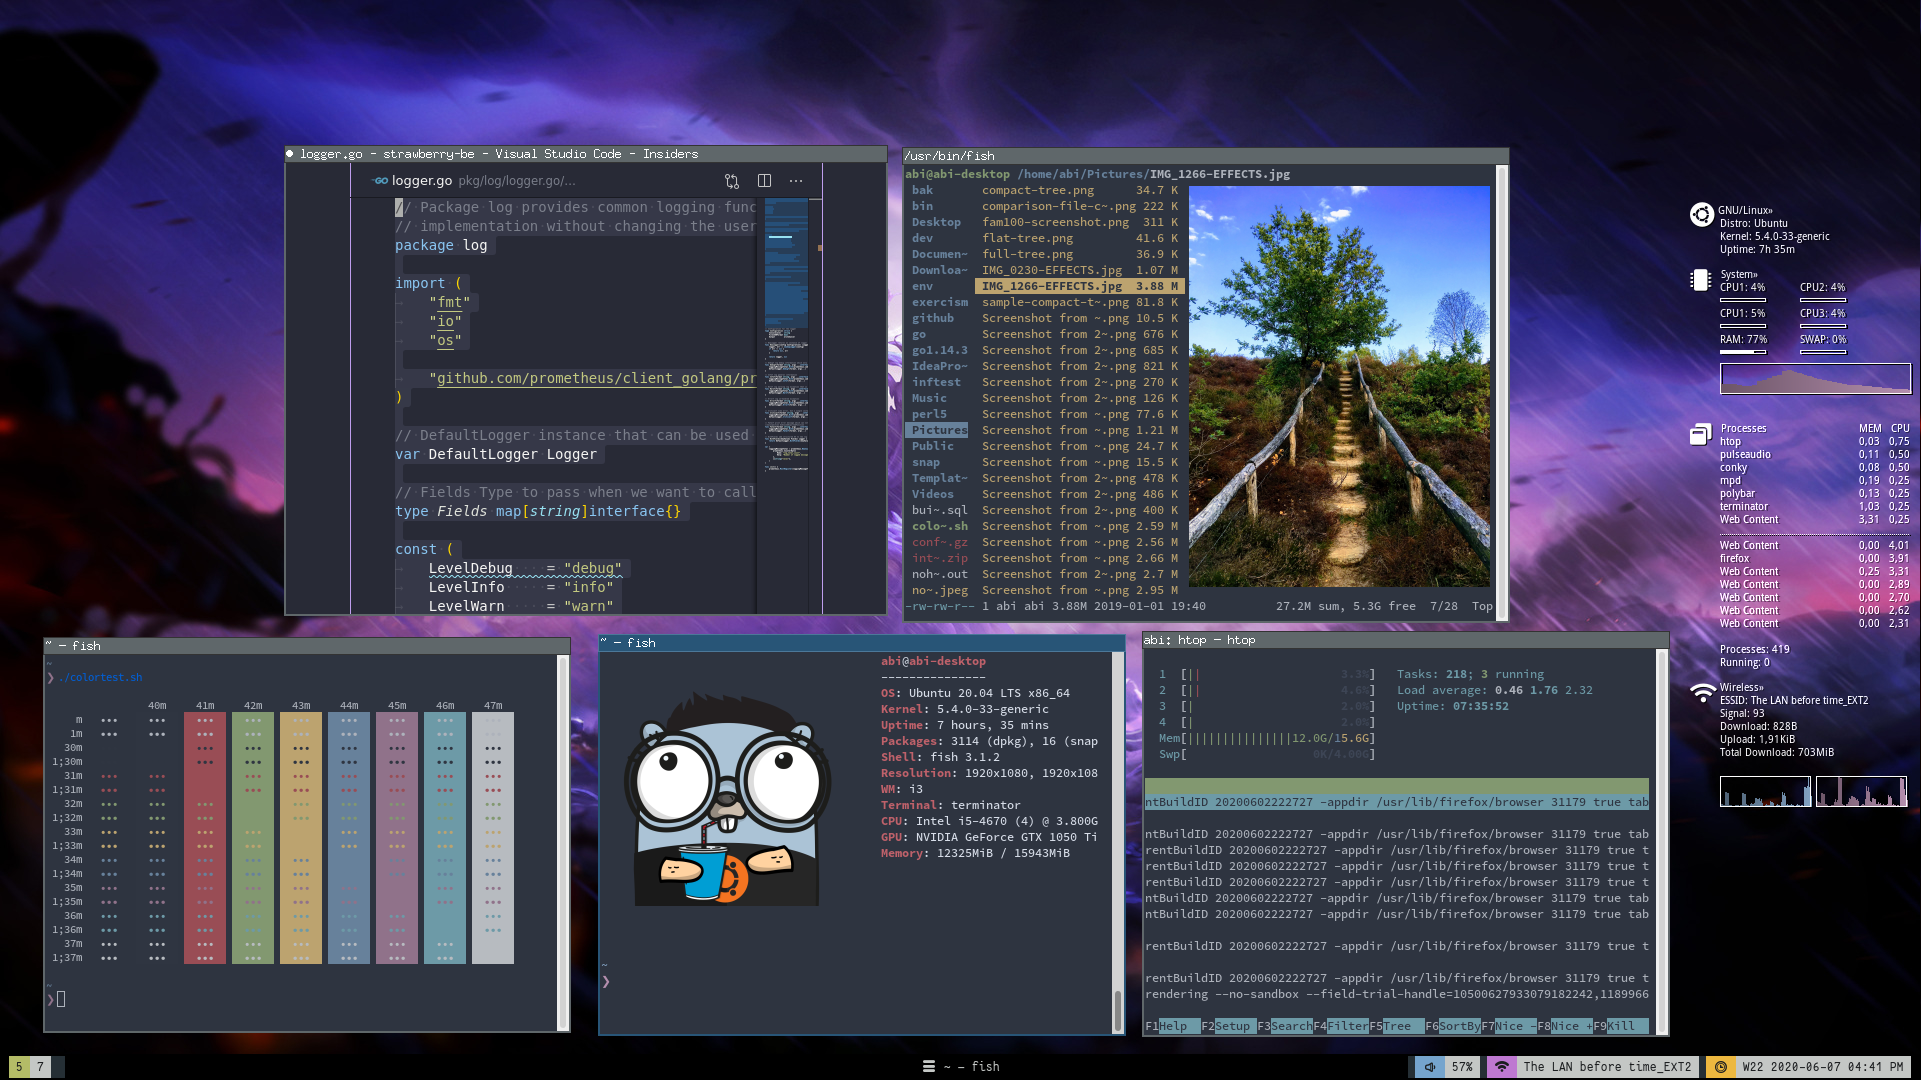
Made with:
- Window Manager: i3
- Background: Ori
- Color Scheme: Nord
- Polybar: adi1090x/polybar-themes-8
- Conky: conky
This weekend i’ve been playing with my i3 desktop settings. Here are the result
Made with:
If you are in the need of converting your custom intellij live tempate, you can use this method to transform it.
The first thing you need to is is to locate the template file. You can find it inside the intellij settings directory which is vary per operating system. See this documentation to locate it.
For example for my golang templte in linux, I find it under
It’s all started when my colleague asked this question.
1package main
2
3import "testing"
4
5const size = 1000000
6
7type SomeStruct struct {
8 ID0 int64
9 ID1 int64
10 ID2 int64
11 ID3 int64
12 ID4 int64
13 ID5 int64
14 ID6 int64
15 ID7 int64
16 ID8 int64
17}
18
19func BenchmarkForVar(b *testing.B) {
20 slice := make([]SomeStruct, size)
21 b.ReportAllocs()
22 b.ResetTimer()
23 for i := 0; i < b.N; i++ {
24 for _, s := range slice { // index and value
25 _ = s
26 }
27 }
28}
29func BenchmarkForCounter(b *testing.B) {
30 slice := make([]SomeStruct, size)
31 b.ReportAllocs()
32 b.ResetTimer()
33 for i := 0; i < b.N; i++ {
34 for i := range slice { // only use the index
35 s := slice[i]
36 _ = s
37 }
38 }
39}
Curriculum vitae
Ahmy yulrizka - Senior Software Engineer
I have more than 11 years of experience in software development. I involved in designing, architect, and implementing high throughput systems serving traffic for one of the top popular sites in the Netherlands.
Testing go 1.5 cross compilation on raspberry pi
I’m so excited with the new release of golang. One particular feature
is now very easy to build for multiple architecture. If you seen my other posts,
I also like to tinker with my raspberry-pi. On my previous project I use either ruby
or python for building some stuff. One annoying thing is dependency, setup and compilation
is usually quite slow. Would be cool if I could just create some stuff in desktop and just
scp the binary to pi and everything should work!
osx-push-to-talk App
Push To Talk app for OSX
 PushToTalk App installer
As a part of scrum teams, every day I need to give updates to my team via Google Hangout.
We have a team here in the Netherlands and also in Indonesia.
Some times I am in the same room as a colleague of mine. This sometimes quite annoying
because I can hear my self (with a delay) from his mic. This somehow messed up my brain.
Google Hangout already has a ‘auto adjust mic volume’ that is really great which cancel the noise.
But we still have a problem and end-up muting each other when we want to talk.
Tracking origin of bugs with git bisect
 Disect the rocket, image by ProudloveNathan Proudlove
I’ve been involved with a iOS project this past week. I’m adding functionalities to the CommonSense iOS library.
One of the most annoying thing is that it took about 2 minute to load the project. This is only happened in the unstable branch.
The master branch seems to be working fine. So I knew that somewhere there is a commit when this starts happening.
Stubbing Time.Now() in golang
Sometimes it’s really hard to test functionality that involve with system time.
Especially when we want to test the function with a specific time. For example testing
whether today is end of month or test 2 different behavior at a different time
Below we look into different ways we can mock or stub the time. Each with it’s own
advantages and disadvantages.
Passing the time instance
1func CheckEndOfMonth(now time.Time) {
2 // business process
3}
4
5func main() {
6 CheckEndOfMonth(time.Now())
7}
8
9// for test
10func TestCheckEndOfMonth(t *testing.T) {
11 CheckEndOfMonth(time.Date(2019, 1, 1, 0, 0, 0, 0, time.UTC))
12}
My account just got hacked by Romanian (Possibly)

You are probably familiar with above images. Some random friend sent you an email which you can instantly
recognize as a spam because it only contains one link.
Couple days ago I receive this email which is not the first time for me. But this time it was different.
It actually came from my own Yahoo! account which I never use since more that one year ago.
berks upload core dump
Berksfhel is cookbook dependency for chef. If you are familiar with ruby / python,
think of it as a Bundler or virtual environment for chef
I faced this core dump error while doing berks upload. That command will actualy
push some cookbook to a chef server.
1$ berks upload
2/home/user/.rbenv/versions/1.9.3-p362/lib/ruby/gems/1.9.1/gems/celluloid-0.14.1/lib/celluloid/tasks.rb:47: [BUG] Segmentation fault
3ruby 1.9.3p362 (2012-12-25 revision 38607) [x86_64-linux]
4
5-- Control frame information -----------------------------------------------
6c:0004 p:0112 s:0009 b:0007 l:002040 d:000006 BLOCK /home/user/.rbenv/versions/1.9.3-p362/lib/ruby/gems/1.9.1/gems/celluloid-0.14.1/lib/celluloid/tasks.rb:47
7c:0003 p:0031 s:0005 b:0005 l:002108 d:000004 BLOCK /home/user/.rbenv/versions/1.9.3-p362/lib/ruby/gems/1.9.1/gems/celluloid-0.14.1/lib/celluloid/tasks/task_fiber.rb:11
8c:0002 p:---- s:0003 b:0003 l:000002 d:000002 FINISH
9c:0001 p:---- s:0001 b:-001 l:000000 d:000000 ------
10
11-- Ruby level backtrace information ----------------------------------------
12/home/user/.rbenv/versions/1.9.3-p362/lib/ruby/gems/1.9.1/gems/celluloid-0.14.1/lib/celluloid/tasks/task_fiber.rb:11:in `block in create'
13/home/user/.rbenv/versions/1.9.3-p362/lib/ruby/gems/1.9.1/gems/celluloid-0.14.1/lib/celluloid/tasks.rb:47:in `block in initialize'
14
15....
1/2
»